
Continuing to chronicle my Invisalign journey from a dentist’s perspective, this week we discuss how I’m adjusting to life with Invisalign®
Week 2
Well, I just finished my second week, and it was a lot less eventful than my first.
Learning to place my aligners correctly
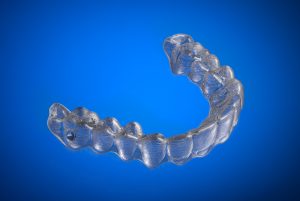
I learned how to set the aligners in my mouth without grabbing my lips or cheeks!
The lower set was more of an issue for me as the bottom lip always seemed to wrap forward and get caught in the aligner as I was snapping it into place.
At the same time, the back of the lower aligner would get close to my cheek on both sides. If I wasn’t careful, I would catch my lip and both cheeks at the same time creating a trifecta of sores.
Pro Tip! Using my fingers
I learned to use my fingers to hold back the lips and cheeks and still allow the aligner to seat in to place on my teeth. I needed all of my fingers to multitask.
Being a dentist, this was second nature to me. However, I see how my patients would fight and struggle to learn some of these skills. Some of them never learn those skills and tricks and come in with sores throughout their mouths.
I resolved to make an effort to teach some of these tricks and hacks when I notice sores that are present. Sharing my knowledge of holding back the lips while placing the aligners would really be a nice thing. I’m sure that my patients will appreciate it.
Inspecting the Invisalign® attachments
While I was placing an aligner, I decided to examine the attachments a little closer. One of my lower teeth, the lower right cuspid (eye tooth) had two attachments.
Remember the attachments are the little projections that are bonded to the teeth to help the aligners grip the teeth better and ultimately move the teeth properly.
The attachments are made of tooth-colored filling material and are relatively invisible. At least they are challenging to see.
Great! One of my Invisalign® attachments were missing
So when I looked a little closer, I noticed that only one of the projections was there. That tooth was missing the second attachment. I will assume that it was there and fell off.
The Importance of having two attachments
Whatever the reason the second attachment on that tooth was important. The cuspids have long roots and are difficult to move. This is probably why the Invisalign software that generated the plan placed two attachments. The better the grip, the more predictable the movement.
So I had to go back and have the second attachment replaced on the tooth. This wasn’t a big deal, except for the fact that the device that was used to holding my lips out of the way was really cutting into my upper lip.
After a reasonable amount of time grimacing and wincing, we decided that adding a cotton roll under my lip would help.
This reinforced to me that all retractors are not created equally.
I knew that from my end. Now I know it from the patients’ end as well.
Chronicling how I’m adjusting to life with Invisalign®
I just switched to the third aligner. I’ll see what develops this week.
In the meantime, I’ll just continue chronicling how I’m adjusting to life with Invisalign®.
Stay tuned for my thoughts on week 3 of this Invisalign Patient Experience – Through the Eyes of a Dentist!
Jeffrey Gross, DDS, FAGD is an Ohio licensed general dentist and is on the staff of Case Western Reserve School of Dental Medicine.
For any questions about Invisalign® or any of the other dental procedures performed at The Healthy Smile Dental Center please call Megan at 440.951.7856